Browsed by
Tag: node.js

Building An Atto Plugin (WIP)

Building An Atto Plugin (WIP)

My notes from working out how to build a plugin for Moodle’s Atto Editor.
(This post is not entirely finished – working out the dialogs)

Plugin Location

Atto Editor plugins can be found in /lib/editor/atto/plugins as defined here and listed here

Note an Atto Plugin is known as a sub-plugin rather than a full plugin although it follows a similar format.

Required Files

  • Version.php
  • /lang/en/atto_pluginname.php
  • /yui/src/button/

Version.php

defined('MOODLE_INTERNAL') || die();

$plugin->version   = 2022030700;        // The current plugin version (Date: YYYYMMDDXX).
$plugin->requires  = 2020061511;        // Requires this Moodle version.
$plugin->component = 'atto_pluginname';  // Full name of the plugin (used for diagnostics). 

Current Moodle version can be found in Moodle’s own version.php file.

The component name is {plugin_type}_{plugin_name}
In this case the plugin type is “atto”

Language String File

This will contain all the translatable language strings for this plugin.
It should follow the frankenstyle naming convention of {plugin_type}_{plugin_name}.php i.e. the component name set in version.php

It should at least contain the name of the plugin in there.

$string['pluginname'] = 'Plugin Name';

YUI src button module

This is currently required but looking at the documentation it looks like Moodle are planning on replacing YUI with something else in the future. I worked through the documentation and experimented with it and have recorded more information below.

YUI Modules

Moodle used to use shifter to compile the YUI modules in the past. According to documentation it currently uses Grunt to compile the JS now but the documentation isn’t fully up to date on how this works in practise. I found much more information on how to use shifter so started off with this and will work on shifting to Grunt.

Basic File Structure

  • /build
    • This is where the compiled files get stored this is what Moodle actually loads.
  • /src
    • /button
      • /js
        • button.js
          (contents / working code for the module)
      • /meta
        • button.json
          (list of dependencies for the module)
      • build.json
        (essentially instructions for shifter or grunt on how to build the final js file)

Example build.json

{
  "name": "moodle-atto_pluginname-button",
  "builds": {
    "moodle-atto_pluginname-button": {
      "jsfiles": [
        "button.js"
      ]
    }
  }
}

Note the name “moodle-atto_pluginname-button” in “Builds” indicates the name of the folder it compiles to. The “Name” indicates the name of the javascript files after compiling.

Example /meta/button.json

{
    "moodle-atto_boostrap4moodle-button": {
        "requires": [
            "moodle-editor_atto-plugin"
        ]
    }
}

Example /js/button.js

Moodle Documentation has a list of examples for this file. Update the examples to use your component and plugin name. e.g. in the atto_strike example you would replace “atto_strike” with “atto_pluginname”

Compiling with Shifter

This is the old way of compiling the YUI module and reading through the threads on it, YUI will eventually be replaced but that may be sometime away yet due to the complexity. I’m going to take a look at compiling with Grunt as well but found more information on shifter so looked at it initially as a temporary way of compiling the YUI module.

To use shifter you need to have node.js installed then install shifter.

npm -g install shifter

Once installed navigate to your YUI /src folder and run the shifter watch command.

 cd ../yui/src/
 shifter --watch

Any change you make in button.js after that will cause the compiler to recompile all the files into the build folder.

Button Icon Locations

Icons need to be stored in /pix/filename within the plugin. SVG is supported 😊
They can then be referenced in button.js when creating a button – example below:

		this.addToolbarMenu({
			icon: 'e/bootstrap', 
			iconComponent: 'atto_pluginname',
			title: 'pluginname',
			globalItemConfig: {
				callback: this._changeStyle
			},
			items: items
		});

The icon name “e/bootstrap” is referring to an image stored at /pix/e/bootstrap.svg inside the plugin.
The iconComponent name is the plugin component name so it know to look in /lib/editor/atto/plugins/atto_pluginname
The title “pluginname” is reference to a language string in /lang/en/atto_pluginname.php

Experimenting with Button.js

I’ve added a few examples of what you can do in the YUI module. I learned a lot of this looking at the code for Core Moodle Atto plugins. A good one to check out is the atto_table plugin.

Using Language Strings in Button.js

You can reference language strings in your YUI module with the following reference:

M.util.get_string("stringReference", component)

Replace “stringReference” with the name of your string located in /lang/en/atto_pluginname.php

The variable component should be declared somewhere in the code and be the component name of your plugin e.g. atto_pluginname

The string should also be listed in the lib.php file for the plugin in the function atto_pluginname_strings_for_js (replace atto_pluginname with your plugin component name).

function atto_pluginname_strings_for_js() {
    global $PAGE;

    $PAGE->requires->strings_for_js(array('stringReference'),
                                    'atto_pluginname');
}

Reference : https://docs.moodle.org/dev/Atto#Atto_subplugin_Php_API

If using mustache templates you can also reference these strings using the following reference and passing the variable via javaScript

{{get_string "stringReference" component}}
var component = 'atto_pluginname',
EXAMPLETEMPLATE = '<div>{{get_string "stringReference" component}}</div>';

You can then use the below code to convert the mustache strings in the example template to the Language strings stored in your plugin language file ( /lang/en/atto_pluginname.php ). Remember to pass the component name (usually stored in a variable) and to reference the string in the plugin’s lib.php file otherwise it won’t work!

/* This example function can pass form content to a dialogue box in Atto */
_getDialogueContent: function() {
		
		// this will be the form template.
		var finaltemplate = Y.Handlebars.compile(EXAMPLETEMPLATE);
		
		// insert variables into the template
		var content = Y.Node.create(finaltemplate({
			component: component
		}));
		
		return content;
	},

Inserting a Template into Content Example

	 /**
	 * Change the title to the specified style.
	 *
	 * @method _insertTemplate
	 * @param {EventFacade} e
	 * @param {string} template
	 * @private
	 */
	_insertTemplate: function(e, template) {
		this._currentSelection = this.get('host').getSelection();
		var host = this.get('host');
		
		// Focus on the last point.
		host.setSelection(this._currentSelection);
		
		// And add the template. e.g. <p>test</p>
		host.insertContentAtFocusPoint(template);
		
		// Mark as updated
		this.markUpdated();
	}

A callback that can be added to globalItemConfig: { } to insert a HTML template into the main content editor. This can be extended to fill in information from a dialog form.

Note: I think there is probably a way to compile the template passed in like there is for the form dialogue but I ended up writing a custom one for inserting into Editor Content because if I use the same method as form dialogue it goes wrong – I’m suspecting I don’t have a setting right somewhere but I need to look deeper into this!

/**
	 * Replace Mustache Placeholders with content
	 *
	 * @method _replaceMustache
	 * @param {string} template (html)
	 * @param {object} variables
	 * @private
	 */
	_replaceMustache: function(template, variables) {
		
		// holder for the final output.
		var finalHtml = template;
		
		// this next bit is only if we have variables to play with.
		if(typeof variables == "object" && Object.keys(variables).length !== 0) {
			
			// Loop through the object
			for (const [key, value] of Object.entries(variables)) {
				
				// find each mustache key and replace with the value.
				var regex = new RegExp(`{{${key}}}`,`g`);
				finalHtml = finalHtml.replace(regex, value);
				
			}
			
		}
		
		return finalHtml;
	},

Troubleshooting

A few things that tripped me up while working out how to get this to work!

Button not appearing

Check it has been set in Site Administration > Plugins > Text Editors > Atto HTML Editor -> Atto Toolbar Settings ( ../admin/settings.php?section=editorsettingsatto )

Add “pluginname = pluginname” to the bottom of Toolbar Config to make it show at the end of the toolbar. You can also insert it inside a group of icons if needed.
Note you should change “pluginname” to match your component name

Question for later : is it possible to add it by default or is that a bad idea and if so why?

Missing Strings?

If a string is called in the YUI js files it must be specified in the language strings file in order to show. Otherwise you will get errors!

It also may need to be specified in lib.php in the atto_pluginname_strings_for_js() function.

function atto_pluginname_strings_for_js() {
    global $PAGE;

    $PAGE->requires->strings_for_js(array('accordion',
										  'pluginname',
										  'h3',
                                          'h4',
                                          'h5',
                                          'pre',
                                          'p'),
                                    'atto_pluginname');
}

Missing YUI component?

This seems very obvious in hindsight but although the documentation only mentions requiring yui/src/button.js you actually need javascript files in /yui/build/moodle-atto_pluginname-button/ to exist for example : moodle-atto_pluginname-button.js as well for this to work. Otherwise it just won’t load and you’ll get a missing module message in dev tools console. These files get automatically created when you compile with shifter or (presumably) Grunt.

YUI module not compiling

One of those silly obvious ones but make sure any custom functions you add are separated by a comma!

Useful Documentation

https://docs.moodle.org/dev/Atto
https://docs.moodle.org/dev/Frankenstyle
https://docs.moodle.org/dev/YUI/Modules
https://docs.moodle.org/dev/YUI/Shifter
https://docs.moodle.org/dev/Grunt
Learning React.js

Learning React.js

I’ve decided to learn how to use react.js in order to create my XD plugin. I felt the best way to start was probably to go through some of React’s basic tutorials and write down my notes as I go along.

The two tutorials are located here :

Create a New React App
React.js Main Tutorial – Tic Tac Toe

I already have node.js and npm installed see Learning Node.js and Webpack

$ npx create-react-app my-app
$ cd my-app
$ npm start

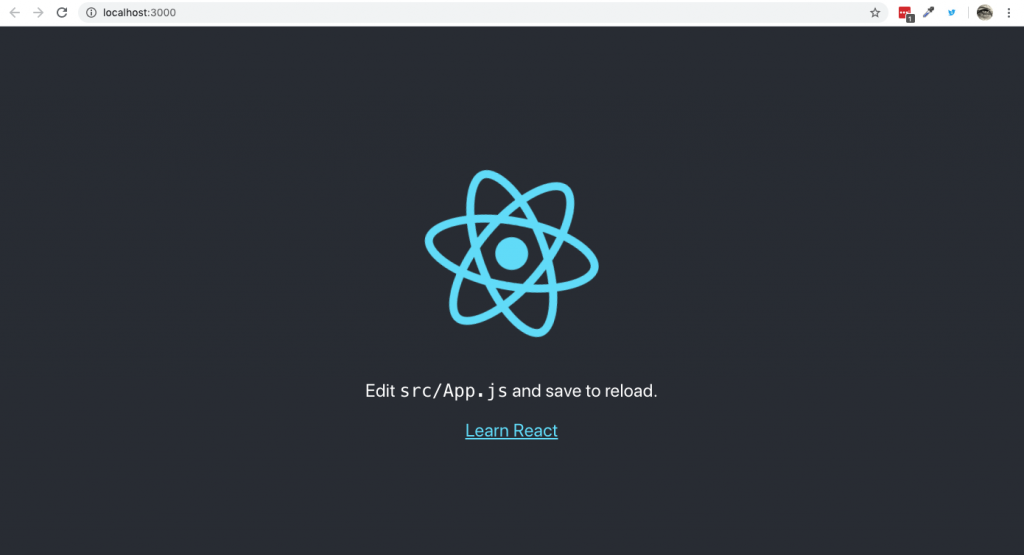
After follow these steps you end up with the following screen:

Screenshot of the local working app.

JSX Note
“Most React developers use a special syntax called “JSX” which makes the react element easier to write.”

https://reactjs.org/tutorial/tutorial.html

Chrome and Firefox have addons for debugging and inspecting React.js componants.

“Immutability makes complex features much easier to implement. Later in this tutorial, we will implement a “time travel” feature that allows us to review the tic-tac-toe game’s history and “jump back” to previous moves. This functionality isn’t specific to games — an ability to undo and redo certain actions is a common requirement in applications. Avoiding direct data mutation lets us keep previous versions of the game’s history intact, and reuse them later.”

“Detecting changes in immutable objects is considerably easier. If the immutable object that is being referenced is different than the previous one, then the object has changed.”

https://reactjs.org/tutorial/tutorial.html

this.state : refers to the current component
this.props : refers to the parent component

Taking it Further

The React tutorial has a few suggestions for taking the tic tac toe game example further. I’m going to have a go at them and see if I can complete them.

Display the location for each move in the format (col, row) in the move history list.

I’m going to modify the history constant to also record the location of the move (so I don’t have to do things like comparing arrays which is probably more complicated).

class Game extends React.Component {
    constructor(props) {
        super(props);
        this.state = {
            history: [{
                squares: Array(9).fill(null),
                location: null,
            }],
            stepNumber: 0,
            xIsNext: true,
        };
    }
    // Rest is the same...
}

I’ve added in another part “location: null,”

I plan to store the cell key here.

handleClick(i) {
    const history = this.state.history.slice(0, this.state.stepNumber + 1);
    const current = history[history.length - 1];
    const squares = current.squares.slice();
        
    if(calculateWinner(squares) || squares[i]) {
        return;
    }
    squares[i] = this.state.xIsNext ? 'X' : 'O';
    this.setState({
        history: history.concat( [{
            squares: squares,
            location: i
        }]),
        stepNumber: history.length,
        xIsNext: !this.state.xIsNext,
    });
}

Then in the handleClick(i) I modified the setState to record the location.

Then I change the render() function in the Game class to the following:

render() {
    const history = this.state.history;
    const current = history[this.state.stepNumber];
    const winner = calculateWinner(current.squares);
        
    const moves = history.map((step, move) => {
        const desc = move ?
            'Go to move #' + move + ' Location: #' + history[move].location :
            'Go to game start';
        return (
            <li key={move}>
                <button onClick={() => this.jumpTo(move)}>{desc}</button>
            </li>
        );
    });

    // rest is the same....
}

So it is now displaying the location. However the challenge was to show the column and the row so I need to translate that number into the column and row.

I ended up creating an array of all the possible locations in handleClick()

handleClick(i) {
    const history = this.state.history.slice(0, this.state.stepNumber + 1);
    const current = history[history.length - 1];
    const squares = current.squares.slice();
    const locations = [
        [1,1],
        [2,1],
        [3,1],
        [1,2],
        [2,2],
        [3,2],
        [1,3],
        [2,3],
        [3,3]
    ];
    // ....
}

Then instead of just recording the square key in the location parameter I changed it to the value of the locations array.

handleClick(i) {
    const history = this.state.history.slice(0, this.state.stepNumber + 1);
    const current = history[history.length - 1];
    const squares = current.squares.slice();
    const locations = [
        [1,1],
        [2,1],
        [3,1],
        [1,2],
        [2,2],
        [3,2],
        [1,3],
        [2,3],
        [3,3]
    ];
        
    if(calculateWinner(squares) || squares[i]) {
        return;
    }
    squares[i] = this.state.xIsNext ? 'X' : 'O';
    this.setState({
        history: history.concat( [{
            squares: squares,
            location: locations[i]
        }]),
        stepNumber: history.length,
        xIsNext: !this.state.xIsNext,
    });
        
}

Task one complete.

Bold the currently selected item in the move list.

Easiest way to do this is to put bold tags around the button. The stepNumber keeps track of what move it currently is.

render() {
    const history = this.state.history;
    const current = history[this.state.stepNumber];
    const winner = calculateWinner(current.squares);
        
    const moves = history.map((step, move) => {
        const desc = move ?
            'Go to move #' + move + ' Column: ' + history[move].location[0] + ' Row: ' + history[move].location[1] :
            'Go to game start';
        return (
            <li key={move}>
                <button onClick={() => this.jumpTo(move)}>
                    {move == this.state.stepNumber ? <strong>{desc}</strong> : desc}
                </button>
            </li>
        );
    });
}

This checks if the current move number matches the overall step number. If it does it adds some bold tags.

Things I noticed….

You don’t need to enclose the html in quotes
The variable being referenced has to be in one of the parent elements (which makes sense) and it has to be passed from the parent element to the child element.
For some reason the last desc doesn’t need brackets – I’m not sure why this is the case at present. I’m assuming it’s because there’s no html so the brackets just escape the variable from the html string? If there was html I suspect it would need brackets.

Rewrite Board to use two loops to make the squares instead of hardcoding them.

I found this a bit tricker to solve but my solution ended up as follows:

Added a variable to the state of the Game component

class Game extends React.Component {
    constructor(props) {
        super(props);
        this.state = {
            history: [{
                squares: Array(9).fill(null),
                location: null,
            }],
            stepNumber: 0,
            xIsNext: true,
            cols: 3,
            rows: 3,
        };
    }

    // ....
}

Then modified the Game render() of Board to include the two new variables:

        return (
            <div className="game">
                <div className="game-board">
                    <Board 
                        squares={current.squares}
                        cols={cols}
                        rows={rows}
                        onClick={(i) => this.handleClick(i)}
                    />
                </div>
                <div className="game-info">
                    <div>{status}</div>
                    <ol>{moves}</ol>
                </div>
            </div>
        );

Modified renderSquare to have keys (otherwise you will get warning errors)

    renderSquare(i) {
        return (
            <Square 
                key={i}
                value={this.props.squares[i]}
                onClick={() => this.props.onClick(i)} 
            />
        );
    }

Added a renderRow function to create each individual row

    renderRow(currentRow) {
        let row = [];
        const count = currentRow * this.props.cols;
        
        for(let i=0; i < this.props.cols; i++) {
            const key = count + i;
            row.push(this.renderSquare(key));
        }
        
        return (
            <div key={currentRow} className="board-row" id={currentRow}>
                {row}
            </div>);
    }

This should recieve the current row numer (e.g. 0, 1 or 2 for each of the 3 rows).

The counter will always start at the current row number times the total number of columbs. e.g.

If the number of columns is 3

0 * 3 = 0 // Start on Cell Number 0
1 * 3 = 3 // Start on Cell Number 3
2 * 3 = 6 // Start on Cell Number 6

A for loop is then run to create the number of columns specified.
Each key is then calculated by the current Cell Number + the current column number.
e.g

Row 0:

Cell Number Start 0 + Column 0 = Key 0
Cell Number Start 0 + Column 1 = Key 1
Cell Number Start 0 + Column 2 = Key 2

Row 1:

Cell Number Start 3 + Column 0 = Key 3
Cell Number Start 3 + Column 1 = Key 4
Cell Number Start 3 + Column 2 = Key 5

Row 2:

Cell Number Start 6 + Column 0 = Key 6
Cell Number Start 6 + Column 1 = Key 7
Cell Number Start 6 + Column 2 = Key 8

Each column then adds a square with the relevant key to an array.
Finally the finished row is returned by the function.

Added a function called renderRows to the Board component:

   renderRows() {
        let gameBoard = [];
        
        for(let i=0; i < this.props.rows; i++) {
            gameBoard.push(this.renderRow(i));
        }
        return gameBoard;
    }

For each row the renderRow function is run and adds the result to the gameBoard array which is then returned by the function.

Finally I edited the render function to the below:

    render() {
            
        return ( 
            <div>
                {this.renderRows()}
            </div>
        );
   }

This has the added bonus of meaning you can expand the board size. However for that to work I need to do a few extra things!

First I need to add a variable for locations to the main Game component.

class Game extends React.Component {
    constructor(props) {
        super(props);
        this.state = {
            history: [{
                squares: Array(9).fill(null),
                location: null,
            }],
            stepNumber: 0,
            xIsNext: true,
            cols: 3,
            rows: 3,
            locations: [],
        };
    }
    // ...
}

In the Game.render() I also need to add the variable to the Board Component so the Board class can manipulate it.

<Board 
    squares={current.squares}
    cols={cols}
    rows={rows}
    locations={this.state.locations}
    onClick={(i) => this.handleClick(i)}
/>

Then I modify Board.renderRow() to update the locations variable as it creates the board.

    renderRow(currentRow) {
        let row = [];
        const count = currentRow * this.props.cols;
        
        for(let i=0; i < this.props.cols; i++) {
            const key = count + i;
            
            let location = [(currentRow + 1),(i + 1)];
            this.props.locations.push(location);

            row.push(this.renderSquare(key));
        }
        
        return (
            <div key={currentRow} className="board-row" id={currentRow}>
                {row}
            </div>);
    }

Then I updated the Game.handleClick() to use the state variable locations. And also to pass along the number of rows and columns to

    handleClick(i) {
        const history = this.state.history.slice(0, this.state.stepNumber + 1);
        const current = history[history.length - 1];
        const squares = current.squares.slice();
        const locations = this.state.locations;
        const rows = this.state.rows;
        const cols = this.state.cols;

        if(calculateWinner(squares, rows, cols) || squares[i]) {
            return;
        }

        // ....
   }

And Finally I updated the CalculateWinner function…

function calculateWinner(squares, rows, cols) {
    
    const wLines = [];
    
    for(let j=0; j < rows; j++) {
        
        let currentRow = j;
        let startCell = currentRow * cols;
        
        for(let k=0; k < cols; k++) {
            
            let key = startCell + k;
            
            // horizontal rows e.g. 0 1 2
            if(key + 2 <= (startCell + (cols - 1))) {
                let winner = [key,(key+1),(key+2)];
                wLines.push(winner);
            }
            
            // vertical columns e.g. 0 3 6
            if((currentRow + 2) <= (rows - 1) ) {
                let winner = [key,(key+cols),(key+(cols * 2))];
                wLines.push(winner);
            }
            
            if((currentRow + 2) <= (rows - 1) ) {
                // diagonals top left to bottom right e.g. 0 4 8
                if(key + 2 <= (startCell + (cols - 1))) {
                    let winner = [key,(key+cols+1), (key+(cols * 2)+2)];
                    wLines.push(winner);
                }
                // diagonals top right to bottom left e.g. 2 4 6
                if( key - 2 >= startCell ) {
                    let winner = [key, (key+cols-1),(key+(cols * 2)-2)];
                    wLines.push(winner);
                }
            }
        }
    }
    
    for( let i=0; i< wLines.length; i++) {
        const [a,b,c] = wLines[i];
        if(squares[a] && squares[a] === squares[b] && squares[a] === squares[c]) {
            return squares[a];
        }
    }
    return null;
}

Add a toggle button that lets you sort the moves in either ascending or descending order.

This one seemed a bit easier. First I added the toggle button to the Game Info, in Game ->render().

<div className="game-info">
    <div>{status}</div>
    <div className="order-moves">
        <button onClick={() => this.reOrderMoves()}>
            Toggle Order {currentOrder}
        </button>
    </div>
    <ol>{moves}</ol>
</div>

Then I added a variable to the state to record the order.

class Game extends React.Component {
    constructor(props) {
        super(props);
        this.state = {
            history: [{
                squares: Array(9).fill(null),
                location: null,
            }],
            stepNumber: 0,
            xIsNext: true,
            cols: 10,
            rows: 10,
            locations: [], 
            sortOrderDesc: false
        };
    }

    //...
}

Then I added a handler for the button that changes the state to the opposite of the current state.

    reOrderMoves() {
        this.setState({
            sortOrderDesc: (this.state.sortOrderDesc === true ? false : true),
        })
        this.render();
    }

Finally I made some changes to the Game->render() function.

    render() {
        
        // ....

        const sortOrderDesc = this.state.sortOrderDesc;
        const currentOrder = (sortOrderDesc ? '(Ascending)' : '(Descending)');
        
        
        const moves = history.map(...);
        
        if(sortOrderDesc === true) {
            moves.reverse();
        }

        // ....
}

This reverses the order of the moves array so it renders in reverse.

When someone wins, highlight the three squares that caused the win.

Ok I decided I need some way of identifying each square so I modified the Square component so that I can target the correct square.

function Square(props) {
    return (
        <button id={props.id} className={props.className} onClick={props.onClick}>
            {props.value}
        </button>
    )
}

Then I edited the Render Square function so the code sets the id and the className. I’m not sure which I’m going to use but this will give me a couple to try.

    renderSquare(i) {

        let className = 'square';
        
        if(this.props.winner) {
            let wRow = this.props.winner[1];
            for(let j = 0; j<wRow.length; j++) {
                if(wRow[j] == i) {
                    className = 'square winner';
                }
            }
        }
        return (
            <Square 
                key={i}
                id={i}
                className={className}
                value={this.props.squares[i]}
                onClick={() => this.props.onClick(i)}
            />
        );
    }

(Later I settled on changing the class name if the number was in the winning row).

Then I edited the CalculateWinner function so it returns the winning row as well as the winner.

function calculateWinner(squares, rows, cols) {

    // ...

    for( let i=0; i< wLines.length; i++) {
        const [a,b,c] = wLines[i];
        if(squares[a] && squares[a] === squares[b] && squares[a] === squares[c]) {
            return [squares[a], wLines[i]];
        }
    }
    return null;
}

Then I modified everywhere that Calculate Winner was referenced so it could still handle it properly.

    render() {
         // ....
         const winner = calculateWinner(current.squares, rows, cols);

         // ....

         if(winner) {
            status = 'Winner: ' + winner[0];
            
        } else {
            status = 'Next player: ' + (this.state.xIsNext ? 'X' : 'O');
        }

        // ....

    }

Finally I added some CSS

.square.winner {
    background: green;
    color: #fff;
}

When no one wins, display a message about the result being a draw.

Last one 🙂

My solution was to check whether any of the squares were still null. If they weren’t and no winner had been selected it returned the draw result.

First a small modification to renderSquare to check the second array is not null.

renderSquare(i) {
        
        let className = 'square';
        
        if(this.props.winner && this.props.winner[1] !== null) {
            let wRow = this.props.winner[1];
            for(let j = 0; j<wRow.length; j++) {
                if(wRow[j] === i) {
                    className = 'square winner';
                }
            }
        }
        // ....
}

Then I modified calculateWinner function to include a bit below the winning line check.

function calculateWinner(squares, rows, cols) {
    
    //....

    let numberNotNull = 0;
    
    for( let j=0; j< squares.length; j++) {
        if(squares[j] !== null) {
            numberNotNull++;
        }
    }
    
    if(numberNotNull === (rows * cols)) {
        return ['Draw',null];
    }
    
    
    return null;
}

Having finished my game I ran the build function to create an optimised version.

$ yarn build
The Finished React Project
Learning to Use Node.js NPM and WebPack

Learning to Use Node.js NPM and WebPack

As part of my XD Plugin project I needed to use Node.js, npm and WebPack.js . I’m documenting this for my future reference.

Installing Node.js also installs a copy of npm. According to npm the copy of npm that Node.js installs is often out of date so I followed their instructions to install.

npm install npm@latest -g

Permissions Error

Note: If like me you get a permissions error just add sudo to the start. Only ever do this if you know what you are installing however!

Once that was installed I then installed Webpack.js using their instructions here : https://webpack.js.org/guides/installation/

Once I had finished that I went through the webpack basic tutorial in Terminal to get an idea what it was for.

The XD Plugin React tutorial I was following also uses Yarn so installed that as well. Yarn uses homebrew to install which I already have installed (it’s very useful).

The basic steps when creating a project that will be using a package library seems to be:

  1. Create a Project folder (mkdir)
  2. Navigate to above folder (cd)
  3. Create a package.json file (init) without asking questions ( -y )
  4. Install webpack locally and install webpack-cli this is used to run webpack on the command line
mkdir xdpluginreact
cd xdpluginreact
npm init -y
npm install webpack webpack-cli --save-dev

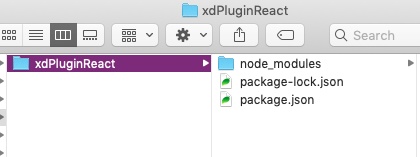
This creates the following files:

Screenshot of created folder structure

It is a good idea to seperate your plugin out into Dev and Distribution since we won’t need all the extra node_modules etc.

To create the initial plugin I followed the XD react tutorial: https://adobexdplatform.com/plugin-docs/tutorials/quick-start-react/

But when you finish that you end up with the main.js file located inside your development folder. You won’t want to copy the entire thing into Adobe XD because you don’t need all of it.

Adding a Distribution Folder

We want to end up with this instead:

A Screenshot of an example XD file

The example-plugin folder in the dist (distribution) folder is the one that gets copied to Adobe XD.

$ mkdir dist
$ mkdir dist/example-plugin
$ mv manifest.json dist/example-plugin
$ rm main.js

This creates the dist folder
Then Creates the example-plugin folder inside the dist folder
Moves the manifest.json (a file which Adobe XD needs) to dist/example-plugin
Deletes the currently compiled main.js

Then we need to change a couple of things. Open package.json and change the following line :

"main": "dist/example-plugin/main.js",

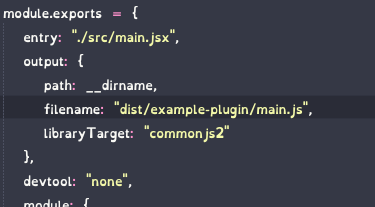
Open webpack.config.js and change the following line in the output section:

filename: "dist/example-plugin/main.js",
Screenshot of my webpack.config.js file.
This is what it should look like.

If I run yarn now this will create the main.js in the desired location

$ yarn build