Browsed by
Tag: CSS

Moodle 4 : Adding Course Image to Header

Moodle 4 : Adding Course Image to Header

Being able to add a course header image has been a popular request so I’ve been looking into how best to do this within the theme…

The Header area’s mustache file is located in lib/templates/full_header.mustache

To add in a header image we would need a way to add the image to the json context and to override the mustache template in our own theme.

The full_header mustache template is renderered by the core_renderer class in lib/outputrenderers.php with the function full_header.

We will need to write a renderer override into our theme to modify this section. In the theme folder you will need a renderers.php file e.g. /example/renderers.php

<?php
// This file is part of Moodle - http://moodle.org/
//
// Moodle is free software: you can redistribute it and/or modify
// it under the terms of the GNU General Public License as published by
// the Free Software Foundation, either version 3 of the License, or
// (at your option) any later version.
//
// Moodle is distributed in the hope that it will be useful,
// but WITHOUT ANY WARRANTY; without even the implied warranty of
// MERCHANTABILITY or FITNESS FOR A PARTICULAR PURPOSE.  See the
// GNU General Public License for more details.
//
// You should have received a copy of the GNU General Public License
// along with Moodle.  If not, see <http://www.gnu.org/licenses/>.

/**
 * Theme Renderer Functions go here.
 *
 * @package     theme_example
 * @copyright   2023 Author Name <email@example.com>
 * @license     https://www.gnu.org/copyleft/gpl.html GNU GPL v3 or later
 */

defined('MOODLE_INTERNAL') || die();

/**
 * Overrides for the standard implementation of the core_renderer interface.
 * Original class located in lib/outputrenders.php and in Boost/classes/output/core_renderer
 */
class theme_example_core_renderer extends \core_renderer {

    // This is where we will add any functions we want to override

}

Add in a class override to the renderers file (see example). The name of your override should follow this pattern : <<theme_component_name>>_core_renderer .

Once setup you can just take a copy of any functions you want to override and place them inside the class.

    /**
	 * Wrapper for header elements.
	 *
	 * @return string HTML to display the main header.
	 */
	public function full_header() {
		$pagetype = $this->page->pagetype;
		$homepage = get_home_page();
		$homepagetype = null;
		// Add a special case since /my/courses is a part of the /my subsystem.
		if ($homepage == HOMEPAGE_MY || $homepage == HOMEPAGE_MYCOURSES) {
			$homepagetype = 'my-index';
		} else if ($homepage == HOMEPAGE_SITE) {
			$homepagetype = 'site-index';
		}
		if ($this->page->include_region_main_settings_in_header_actions() &&
			!$this->page->blocks->is_block_present('settings')) {
			// Only include the region main settings if the page has requested it and it doesn't already have
			// the settings block on it. The region main settings are included in the settings block and
			// duplicating the content causes behat failures.
			$this->page->add_header_action(html_writer::div(
				$this->region_main_settings_menu(),
															'd-print-none',
												   ['id' => 'region-main-settings-menu']
			));
		}
			
		$header = new stdClass();
		$header->settingsmenu = $this->context_header_settings_menu();
		$header->contextheader = $this->context_header();
		$header->hasnavbar = empty($this->page->layout_options['nonavbar']);
		$header->navbar = $this->navbar();
		$header->pageheadingbutton = $this->page_heading_button();
		$header->courseheader = $this->course_header();
		$header->headeractions = $this->page->get_header_actions();
		if (!empty($pagetype) && !empty($homepagetype) && $pagetype == $homepagetype) {
			$header->welcomemessage = \core_user::welcome_message();
		}
		return $this->render_from_template('core/full_header', $header);
	}

Then create a copy of lib/templates/full_header.mustache into your theme’s template folder e.g. example/templates/core/full_header.mustache . This will allow you to change and override the template.

In your theme’s renderers.php file and inside theme_example_core_renderer class in the full_header function add the following to add a new context with some output.

// Add in a custom context
$header->courseimage = '<img src="example.jpg" alt="Course Image" class="courseimage">';

Then in the full_header.mustache file in your theme’s templates modify the following lines:

Add in our new context to the example:

{{!
    @template core/full_header

    This template renders the header.

    Example context (json):
    {
        "contextheader": "context_header_html",
        "settingsmenu": "settings_html",
        "hasnavbar": false,
        "navbar": "navbar_if_available",
        "courseheader": "course_header_html",
        "welcomemessage": "welcomemessage",
        "courseimage" : "course_image_html"
    }
}}

And add in the following where you want the image to appear:

{{{courseimage}}}

If you save all the above, purge the cache and view. You should see a broken image link that we used as an example (you can of course use an actual image url.

Next we need to get it to load the actual course image stored in the course settings.

Add some SCSS to make the course image full width. Note this is based on my own custom theme so may not work with yours – just showing for completeness.

/* Course Header Image */
#page-header {
	position: relative; // needed so the image doesn't overflow

	/* we are adding the surrounding page margins on and extending the image 
	outwards to fill the screen 
	(note my theme uses the full width play around with this as you need) */
	.courseimage {
		position: absolute;
		width: calc(100% + 3.5rem + 1.5rem);
		left: -3.5rem;
		top: 0;
		height: calc(100% + 3rem);
		margin-top: -3rem;
		img {
			object-fit: cover;
			width: 100%;
			height: 100%;
		}
	}
}

Next Steps:

As it is, this just loads the same image over and over using the URL we have given it. It could be better!

  • Fetch the course image from the course settings
  • Add a context check to check if there’s an image
  • modify the mustache template to check if there is an image.

Fetching Course Image

We know that the course image is already loaded on the course listing so it makes sense to see if we can reuse any existing functions.

The course image in the listing is fetched by the function course_overview_files in the core_course_renderer class in course/rendererers.php which uses the function get_course_overviewfiles in the core_course_list_element class in course/classes/list_element.php

First we want to create a new function in our theme_example_core_renderer class in example/rendererers.php . I’m reusing some of the code from the previous functioned mentioned. (There’s possibly a neater way of doing this but this was what I found worked).

	/**
	 * Renders course header image
	 *
	 * @return string HTML to display the course image
	 */
	public function course_header_image() {
		global $CFG;
		
		if ($this->page->course->id == SITEID) {
			// return immediately and do not include /course/lib.php if not necessary
			return '';
		}
		
		// This section has been borrowed from course/renderer.php 
		global $COURSE;
		
		require_once($CFG->libdir. '/filestorage/file_storage.php');
		require_once($CFG->dirroot. '/course/lib.php');
		
		$fs = get_file_storage();
		
		// modified this line so we have the course id for the context.
		$context = context_course::instance($this->page->course->id);
		
		$files = $fs->get_area_files($context->id, 'course', 'overviewfiles', false, 'filename', false);
		if (count($files)) {
			
			// modified this line so we have the course id
			$overviewfilesoptions = course_overviewfiles_options($this->page->course->id);
			
			$acceptedtypes = $overviewfilesoptions['accepted_types'];
			if ($acceptedtypes !== '*') {
				// Filter only files with allowed extensions.
				require_once($CFG->libdir. '/filelib.php');
				foreach ($files as $key => $file) {
					if (!file_extension_in_typegroup($file->get_filename(), $acceptedtypes)) {
						unset($files[$key]);
					}
				}
			}
			if (count($files) > $CFG->courseoverviewfileslimit) {
				// Return no more than $CFG->courseoverviewfileslimit files.
				$files = array_slice($files, 0, $CFG->courseoverviewfileslimit, true);
			}
		}
		$contentimages = '';
		
		// This part has been borrowed and modified from course/classes/list_element.php
		if(!empty($files)) {
			foreach ($files as $file) {
				$isimage = $file->is_valid_image();
				$url = moodle_url::make_file_url("$CFG->wwwroot/pluginfile.php",
												'/' . $file->get_contextid() . '/' . $file->get_component() . '/' .
												$file->get_filearea() . $file->get_filepath() . $file->get_filename(), !$isimage);
				if ($isimage) {
					$contentimages .= html_writer::tag('div',
													html_writer::empty_tag('img', ['src' => $url]),
													['class' => 'courseimage']);
				} else {
					$image = $this->output->pix_icon(file_file_icon($file, 24), $file->get_filename(), 'moodle');
					$filename = html_writer::tag('span', $image, ['class' => 'fp-icon']).
					html_writer::tag('span', $file->get_filename(), ['class' => 'fp-filename']);
					$contentfiles .= html_writer::tag('span',
													html_writer::link($url, $filename),
													['class' => 'coursefile fp-filename-icon']);
				}
			}
			
		}
		
		return $contentimages;
	}

Now if I go back to the full_header function in the theme’s renderer.php file I can change the courseimage to use this function instead:

		// Add in a custom context
		$header->courseimage = $this->course_header_image(); 
		$header->hascourseimage = (!empty($header->courseimage) ? true : false);

I’ve also added in a new check to see if this image is empty – I will need this later to make sure the title is visible over the header banner.

Modify the full_header mustache file to use the new check.

{{!
    @template core/full_header

    This template renders the header.

    Example context (json):
    {
        "contextheader": "context_header_html",
        "settingsmenu": "settings_html",
        "hasnavbar": false,
        "navbar": "navbar_if_available",
        "courseheader": "course_header_html",
        "welcomemessage": "welcomemessage",
        "courseimage" : "course_image_html",
        "hascourseimage" : false
    }
}}
<header id="page-header" class="header-maxwidth d-print-none {{#hascourseimage}}has-course-img{{/hascourseimage}}">
	{{#hascourseimage}}
		{{{courseimage}}}
	{{/hascourseimage}}

And modify our SCSS to make sure the header text is visible.

/* Course Header Image */
#page-header {
	position: relative;

	.courseimage {
		position: absolute;
		width: calc(100% + (3.5rem * 2));
		left: -3.5rem;
		top: 0;
		height: calc(100% + 3rem);
		margin-top: -3rem;
		img {
			object-fit: cover;
			width: 100%;
			height: 100%;
		}
	}
	// padding on the right is different when the right drawer is open
	.show-drawer-right & {
		.courseimage {
			width: calc(100% + 3.5rem + 1.5rem);
		}
	}
	&.has-course-img .page-header-headings h1 {
		background-color: $white;
		padding: 0.5rem 1rem;
		border-radius: 500px;
	}
}

Note : I have more SCSS in my theme to cover different responsive breakpoints and my theme uses the full width of the screen.

Further Improvements

There is one downside of using the course image here – we could end up loading too large an image for a small area – not very efficient! It would be better if we could add a separate setting in the course settings for adding a course header image.

Investigating this and will make another post when I know more about it.
Reducing Motion on Websites

Reducing Motion on Websites

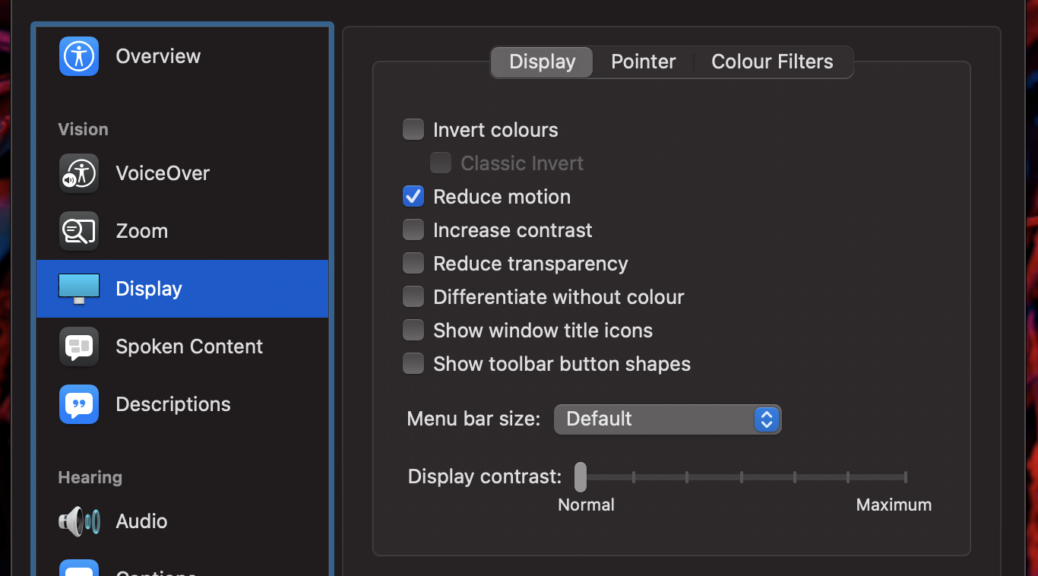
A few months ago I came across a media query for Reduced Motion in CSS. Some users may find some animated motions on websites can make them feel ill. These users can switch on the Reduced Motion setting in their operating system to try and limit these motions.

As web developers we can help by using CSS (and javaScript) to respect that setting.

CSS Media Query for Reduced Motion

Within the media query you can add settings to prevent transitions or animation from happening.

You can even add a wildcard rules so that any transitions or transforms and animations are prevented as I have in the code below.

/* Tone down the animation to avoid vestibular motion triggers like scaling or panning large objects. */
@media (prefers-reduced-motion: reduce) {
	html {
		scroll-behavior: auto; // override smooth scrolling
	}
	* {
		transition: none !important;
		animation: none !important;
		transform: none !Important;
	}
}

Pitfalls

You may find the wildcard approach may disable some transitions or transforms or animations you want to keep so you may have to add some overrides when using that approach or use the css :not notation to ignore certain classes or elements.

/* Tone down the animation to avoid vestibular motion triggers like scaling or panning large objects. */
@media (prefers-reduced-motion: reduce) {
	html {
		scroll-behavior: auto; // override smooth scrolling
	}
	* {
		transition: none !important;
		animation: none !important; 
	}
        // this ignores the elements and classes specified but targets everything else.
	*:not(path, text, g, polyline, rect, svg, clipPath, image, .svg, .mapholder, use) {
		transform: none !Important;
	}
}

JavaScript Respect Reduced Motion

For JavaScript you can use the following code to check if the user has reduced motion set. Then test the matches – if it returns true then the user has reduced motion set.

var mediaQuery = window.matchMedia('(prefers-reduced-motion: reduce)');

if(mediaQuery.matches) {
	$('#'+defid).toggle();  // show and hide rather than...
} else {
	$('#'+defid).slideToggle();  // sliding up and down
}

Further Reading

https://www.smashingmagazine.com/2020/09/design-reduced-motion-sensitivities/
https://alistapart.com/article/accessibility-for-vestibular/

Breadcrumbs CSS

Breadcrumbs CSS

Breadcrumb Styling example I wrote.

I need to double check browser support. Add a fallback for IE 11 and add mobile support.

CSS SVG ClipPaths

CSS SVG ClipPaths

CSS clip path can be useful for creating complex scalable shapes in webdesign.

Example of a Clip Path in action

See the Pen Clip Path Example (Banner Arrows) by Kavita (@Kayakkavita) on CodePen.

Creating an SVG Clip Path in Adobe Illustrator

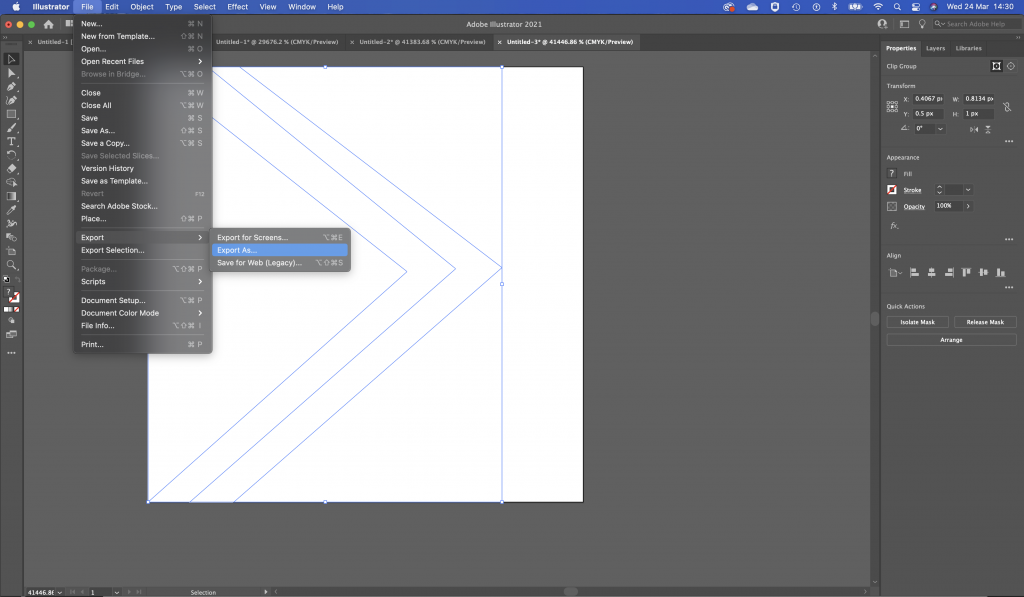
Create a new file 1px high and 1px width*

*This is required because for the svg to be scalable the path coordinates need to be between 0 and 1.

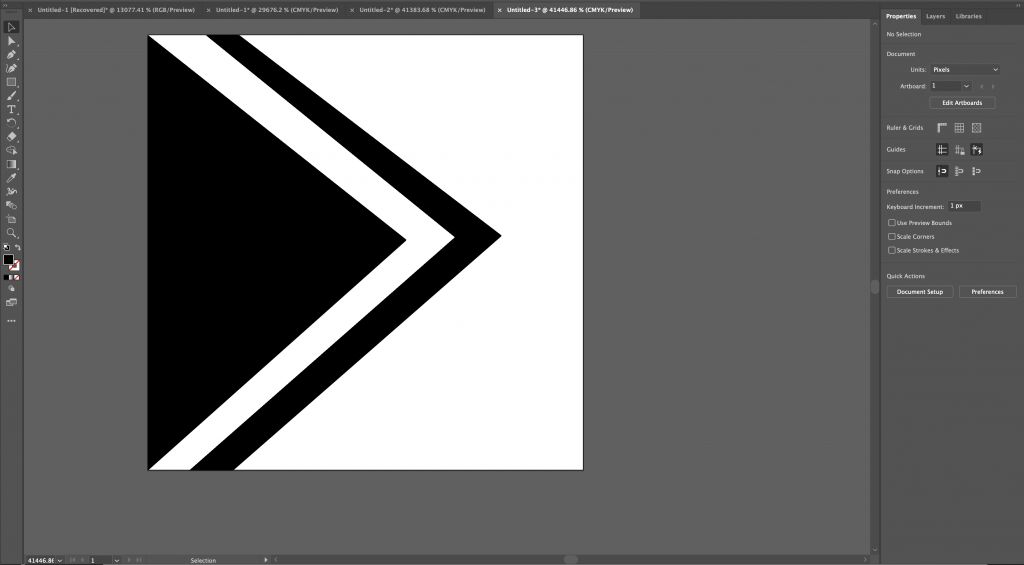
Draw your shape out.

Drawing a vector shape in illustrator

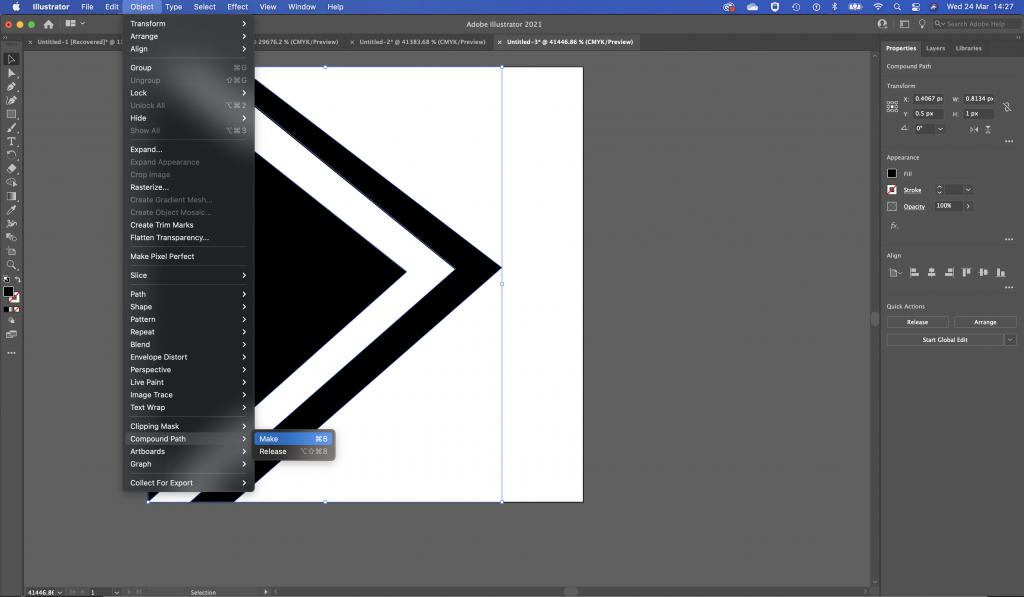
Select your shapes and go to Object > Compound Path > Make.

Draw a rectangle around your shapes (keep within the bounds of the 1px by 1px artboard.

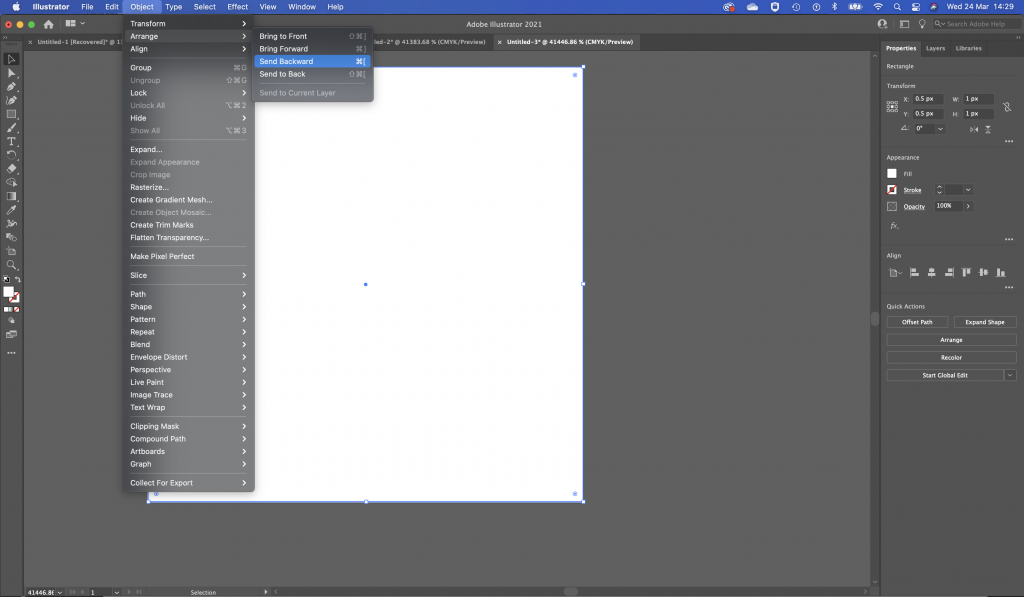
Select that shape then send it to the back so your drawn shape is in front.

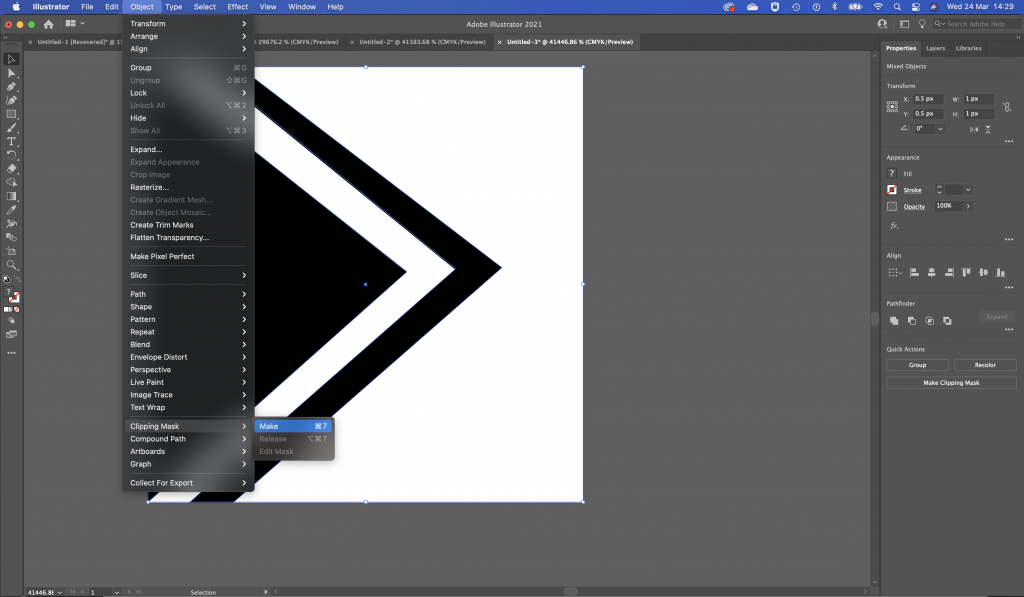
Select both your shape and the box and go to Object > Clipping Mask > Make to change your shape into a clipping mask.

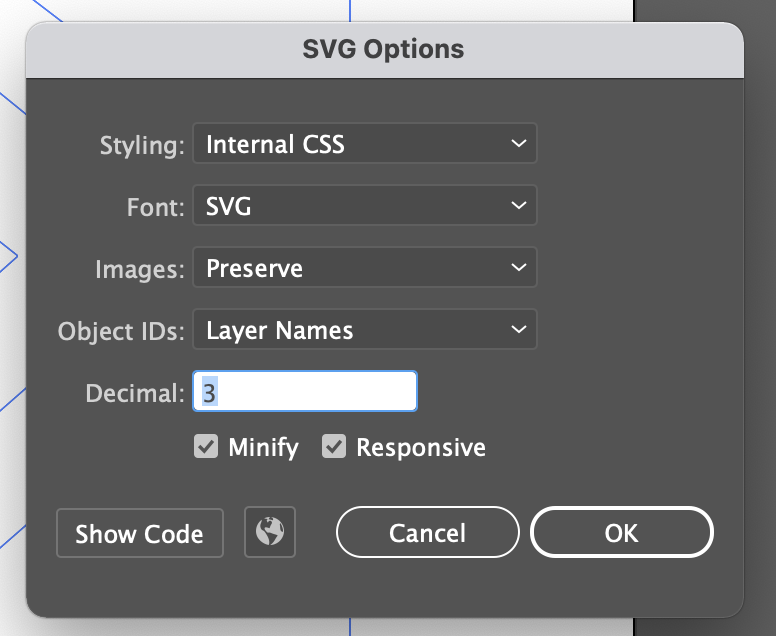
Go to File > Export > Export As to export your vector as an SVG.

Open the svg file into a code editor like Kate and you should see something like this.

<svg id="Layer_1" data-name="Layer 1" xmlns="http://www.w3.org/2000/svg" xmlns:xlink="http://www.w3.org/1999/xlink" viewBox="0 0 1 1">
	<defs>
		<style>.cls-1{fill:none;}.cls-2{clip-path:url(#clip-path);}.cls-3{fill:#fff;}</style>
		<clipPath id="clip-path">
			<path class="cls-1" d="M0,0,.6.47,0,1ZM.136,0,.707.464.1,1H.2L.813.461.21,0"/>
		</clipPath>
	</defs>
	<g class="cls-2"><rect class="cls-3" width="1" height="1"/></g>
</svg>

You need to modify this a bit to use as a mask.

  • Remove the styles
  • Remove the <g> element
  • add width=”0″ and height=”0″ to the SVG label
  • Add clipPathUnits=”objectBoundingBox” to the clippath (this makes it scalable)
<svg id="Layer_1" data-name="Layer 1" xmlns="http://www.w3.org/2000/svg" xmlns:xlink="http://www.w3.org/1999/xlink" width="0" height="0" viewBox="0 0 1 1">
	<defs>
		<clipPath id="clip-path" clipPathUnits="objectBoundingBox">
			<path class="cls-1" d="M0,0,.6.47,0,1ZM.136,0,.707.464.1,1H.2L.813.461.21,0"/>
		</clipPath>
	</defs>
</svg>

The CSS to use it as a clip path…

.banner {
  height: 140px;
  width: 200px;
  background-color: black;
  position:relative;
}
.banner:after {
  content: ' ';
  display:block;
  position: absolute;
  right:-100px;
  bottom: 0px;
  height: 100%;
  width: 100px;
  background-color: black;
  -webkit-clip-path: url("#clip-path"); /* required for Webkit/Blink browsers if you're using only inline SVG clipping paths, but not CSS clip-path */
  clip-path: url("#clip-path");
}

Tips

If you want an SVG to only be at the top. Add a height to the SVG.

(example to follow later).

Reading / Resources

https://www.smashingmagazine.com/2015/05/creating-responsive-shapes-with-clip-path/

https://www.webdesignerdepot.com/2015/01/the-ultimate-guide-to-svg/

https://cssfordesigners.com/articles/clip-path-scaling

https://css-tricks.com/using-svg/

https://webdesign.tutsplus.com/tutorials/website-layouts-with-svg-shapes–cms-35259

Browser Support

https://caniuse.com/?search=clip-path

IE 11 does not support this.
Some browsers will need fallback support.

https://stackoverflow.com/questions/21904672/internet-explorer-and-clip-path

CSS Conic Gradients

CSS Conic Gradients

A recent project I’m working on had an image where a series of colours were laid out like sun rays behind some figures. I was curious if I could do these blocks of colour with CSS. I came across conic-gradients and I’ve been experimenting with it to see what I can do with it.

Repeating Conic Gradient (Sun rays)

.rays {
  background: -webkit-repeating-conic-gradient(from 270deg at 50% 120%, #FFA500 0deg 10deg, #ff6700 10deg 20deg);
  background: -moz-repeating-conic-gradient(from 270deg at 50% 120%, #FFA500 0deg 10deg, #ff6700 10deg 20deg);
  background: repeating-conic-gradient(from 270deg at 50% 120%, #FFA500 0deg 10deg, #ff6700 10deg 20deg);
}

Note : Firefox does not currently support repeating-conic-gradients 🙁

Setting Sun : Repeating Conic Gradient

background: conic-gradient(from 270deg at 50% 100%,#f3d8e6 0 36deg,#F8DCC4 0 72deg,#CAD9B9 0 108deg, #9FC0CC 0 144deg, #BEC5D9 0 180deg, #ffffff 0 100%); 

Polyfills for Firefox / IE 11

https://github.com/jonathantneal/postcss-conic-gradient

http://leaverou.github.io/conic-gradient/

Setting up SASS Compiler using Gulp

Setting up SASS Compiler using Gulp

For future reference a basic SASS compiler using gulp.

Requirements:

  • NPM installed
  • Node.js installed
  • Gulp installed

Installing Gulp

$ [sudo] npm install gulp -g

The sudo command is optional but I needed it to install.

Setting up the compiler…

$ mkdir base-flat-html
$ cd base-flat-html/

$ npm init

$ mkdir sass
$ mkdir css
$ touch sass/theme.scss

This creates a directory,
changes to the new directory.
Initialises NPM in the directory which guides you through creating a package.json file.
Creates a folder called sass. This will contain all the SASS files.
Creates a folder called css. This will contain all the compiled CSS files.
Creates a file called theme.scss in the sass directory.

$ npm install gulp --save-dev

Install Gulp to the directory. This will update your package.json file.

$ npm install gulp-sass --save-dev
$ npm install gulp-cssnano --save-dev
$ npm install gulp-rename --save-dev
$ npm install gulp-wait --save-dev

These lines install:

  • Gulp SASS Compiler
  • Gulp CSS minifier
  • Gulp file renamer
  • Gulp wait module – I use to give the files time to save otherwise it can get stuck in an endless loop when we run gulp watch.

Create a new file called gulpfile.js this will contain all the tasks we want gulp to run.

$ touch gulpfile.js

First add gulp and all the required gulp modules we installed.

var gulp = require('gulp');
var sass = require('gulp-sass');
var cssnano = require('gulp-cssnano');
var rename = require('gulp-rename');
var wait = require('gulp-wait');

Then setup a task for compiling the SASS files

gulp.task('sass', function() {
	return gulp.src('sass/theme.scss')
		.pipe(wait(1500))
		.pipe(sass())
		.pipe(gulp.dest('css'))
});

This task takes the SASS file theme.scss and then waits 1500ms before running the compiler and then saving it to the css folder.

Next I create a task for minifying the compiled CSS.

gulp.task('minicss', function() {
	return gulp.src('css/theme.css')
		.pipe(cssnano())
		.pipe(rename({
			suffix: '.min'
		}))
		.pipe(gulp.dest('css'))
});

This takes the compiled theme.css file and minifies it. Then it creates a renamed copy with .min in the filename and saves it to the css directory.

Finally I add a watch task so that these two tasks will run whenever a change is made to the SASS files.

gulp.task('watch', function() {
	gulp.watch('sass/**/*.scss', gulp.series('sass','minicss', function(done) {
		done();
	}));
}); 

This watches the sass folder and runs the two tasks in sequence whenever a sass file is changed.

Full Code is here : https://github.com/dgrumbler/base-flat-html

To install run:

$ npm init
$ npm install

CSS Pointer Events

CSS Pointer Events

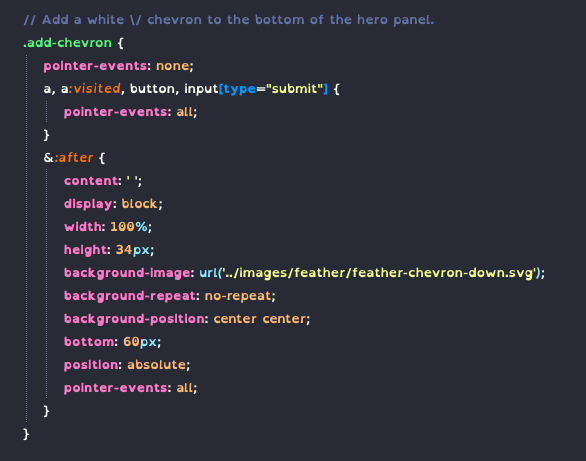
This is maybe only needed in some edge cases, but you can use pointer-events to make psuedo elements (:after and :before) clickable via javascript.

Note: Preferable to use clickable elements if you can though!

My original code when I needed this as a work around.

SCSS Code

.add-chevron {
    // prevents clicking on element from working
    pointer-events: none; 

    // Necessary for allowing any clickable elements within the parent to work. 
    a, a:visited, button {
        pointer-events: all;
    }
    &:after {
        content: 'click me';
        display: block;
        height: 34px;
        width: 34px;
        // allows this pseudo element to be clickable
        pointer-events: all;
    }
}
CSS Tricks : pointer-events

https://caniuse.com/#feat=pointer-events